js写shell的利器--zx
# Google zx 中文版

# 简介
2021年度最流行项目 (opens new window)是zx (opens new window),一个由谷歌推出的全新的工具,可用于以 JavaScript 或 TypeScript 编写简单的命令行脚本。
基本上它可以让你在代码中嵌入任何 bash 表达式(ls, cat, git...等任何命令!),并通过await操作符 (opens new window)使用JavaScript template literals (opens new window)的结果。
它引入了由几个流行的软件包提供的实用工具:
- node-fetch (opens new window) 与浏览器中Fetch (opens new window)有着相同的 API, 可创建 HTTP 请求。
- fs-extra (opens new window) 可处理文件系统操作。
- globby (opens new window) 以用户友好模式来匹配给定的文件名。
# 背景
"Bash 很棒,但是在编写脚本时,人们通常会选择更方便的编程语言。 JavaScript 是一个完美的选择,但标准的 Node.js 库在使用之前需要额外的麻烦。 zx 包提供了围绕 child_process 的有用包装器,转义参数并提供合理的默认值。"
# 扔砖引玉
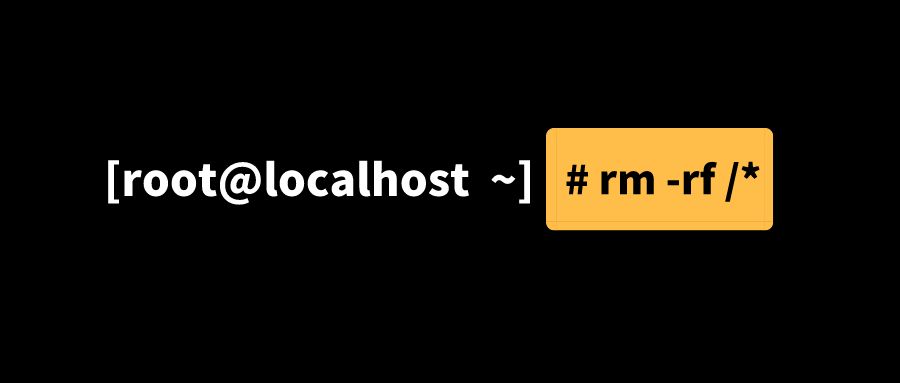
"想象一下,你本来想删除:rm -rf $dir/然后dir是空的时候,变成了什么?rm -rf是删除命令,$dir是空的话,相当于执行 rm -rf /,这是删除所有文件和文件夹。。。然后,你的系统就没了,这就是传说中的删库跑路吗~~~~"
# 历史

# 使用javascript写shell脚本
#! 是一个约定的标记,它告诉系统这个脚本需要什么解释器来运行,即:使用哪一种 shell。#!被称为shebang(也称为 Hashbang) (opens new window),例如使用 bash:#! /bin/bash
最简单的脚本
#!/usr/bin/env node
console.log('hello world');
保存为test,执行该脚本 node test,然后可以在控制台获得输出。
更进一步,我们给该脚本一个执行权限,
chmod 755 test
# 例子-读取给定文件夹下所有的文件
读取当前文件夹使用 fs.readdirSync方法,该方法会返回一个数组,包含了给定文件夹下的所有子文件夹或文件,
举个栗子,在当前目录我有个test文件夹
test
├── 1.html
├── 1.txt
└── files
fs.readdirSync('./test') 的输出为 [ '1.html', '1.txt', 'files' ]
新建个文件,getFile,用来存放脚本代码
# 写死的文件夹
读取给定目录下所有文件并输出的代码如下:
#!/usr/bin/env node

const testFolder = './test/';
const fs = require('fs');

fs.readdirSync(testFolder).forEach(file => {
  console.log(file);
});
# 获取用户输入
以上代码的给定的路径是写死的,我们需要作为参数输入,nodejs读取用户输入的方法:
const [nodeEnv,dir,...args]=process.argv //args是用户输入的参数
修改脚本代码:
#!/usr/bin/env node

const fs = require('fs');
const [nodeEnv,dir,...args]=process.argv

// 获取用户输入的路径
const folder=args[0]

fs.readdirSync(folder).forEach(file => {
  console.log(file);
});
现在执行脚本时,路径就可以自己输入了
node getFile 你的路径
# 原生方式child_process
nodejs可以使用child_process模块新建子进程,用来执行unit系统命令,写个测试的例子,如下所示:
#!/usr/bin/env node


//-----同步写法👇
const execSync=require('child_process').execSync

const res=execSync('ls')
console.log("res", res.toString())


// ----- 异步写法👇
const exec=require('child_process').exec
exec('ls',(err,stdout,stderr)=>{
   if(err)throw err
   console.log(stdout)
})
# shelljs执行linux命令行
首先需要安装shelljs
npm i shelljs -S
shelljs提供了很多方法,最常用的是exec,举个栗子
const shell=require('shelljs')
/**
 * 函数签名:exec(command [, options] [, callback])
 * command:要执行的命令
 * callback:回调函数,对command的输出进行处理
 * options:
 *  async: 异步执行.如果callback提供了,会忽略该参数并强制异步执行  (default: false)
 *  fatal: Exit upon error (default: false).
 *  silent: 不在console中输出(default: false).
 *  encoding: 设置stdout和stderr的编码 (default: 'utf8')
 */

//输出ls的结果
shell.exec("ls")

//callback(code,stdout,stderr)  code为0则成功,否则失败
shell.exec("dir",{silent:true},(code,stdout,stderr)=>{})

shell.exec('ls',{silent:true},(code,stdout,stderr)=>{
    console.log(code)
    console.log(stdout)
})

在开发过程中,常会遇到如下命令:
git add .
git commit -m '*****'
git push
- 在根目录下新建文件shell.js,内容如下:
let shell = require('shelljs')
let name = process.argv[2] || 'Auto-commit';
let exec = shell.exec

if (exec('git add .').code !== 0) {
    echo('Error: Git add failed')
    exit(1)
}
if (exec(`git commit -am "${name}"`).code !== 0) {
    echo('Error: Git commit failed')
    exit(1)
}
if (exec('git push').code !== 0) {
    echo('Error: Git commit failed')
    exit(1)
}
- 只用一条命令执行以上所有任务,在package.json中加入,方法如下:
"script":{
    "push":"node ./shell.js"
}
- 执行
npm run push 测试shelljs提交代码
# 用spawn 来编写跨平台 Node.js命令
如果想要编写跨平台的 spawn 命令,而又不想增加额外的开销的话,可以这样写
const process = require('process');
const { spawn } = require('child_process');

spawn('npm', {
 stdio: 'inherit',
 // 仅在当前运行环境为 Windows 时,才使用 shell
 shell: process.platform === 'win32'
});
# cross-spawn第三方模块
关于 spawn 函数的跨平台写法,除了自己编写代码的时候做处理,也有第三方模块封装好了相关细节,如 cross-spawn。
使用该模块,可以在调用 spawn 函数时,自动根据当前的运行平台,来决定是否生成一个 shell 来执行所给的命令。对命令和参数中的字符进行转义更为方便。
 ### Google zx
“Bash很好,所以我选择JavaScript”
前端开发拿手的不就是 Javascript, 嗯 开整
# 安装和使用
npm i -g zx
安装好 zx 之后,将编写的脚本放在 .mjs 后缀的文件中,或者使用 .js 后缀,但是需要使用 void async function () {...}() 对脚本进行包装。
使用时需注意以下几点:
# 1、脚本需要包含以下文件头:
#!/usr/bin/env zx
# 2. 为脚本添加执行权限再运行
$ chmod +x ./script.mjs
$ ./script.mjs

# 或者使用这个命令
$ zx ./script.mjs
# zx 常用命令
# $command
使用 child_process 包中提供的 exec 函数,可以把字符串当做命令执行,并返回一个 Promise(ProcessOutput) 对象。通过的一切${...}都会被自动转义和引用。
let count = parseInt(await $`ls -1 | wc -l`)
console.log(`Files count: ${count}`)
要并行上传文件,可以使用下面的脚本:
let hosts = [...]
await Promise.all(hosts.map(host =>
  $`rsync -azP ./src ${host}:/var/www`
))
要修改工作路径,可以使用 cd() 方法:
cd('/tmp')
// 将输出 /tmp
await $`pwd`
fetch() 方法是对 node-fetch 包的包装:
let resp = await fetch('http://wttr.in')
if (resp.ok) {
  console.log(await resp.text())
}
question() 方法是对 readline 包的包装:
type QuestionOptions = { choices: string[] }
function question(query: string, options?: QuestionOptions): Promise<string>
用法:
let username = await question('What is your username? ')
let token = await question('Choose env variable: ', {
  choices: Object.keys(process.env)
})
对于 chalk 包,不需要导入就可以直接用:
console.log(chalk.blue('Hello world!'))
fs 包,导入就可以直接用:
let content = await fs.readFile('./package.json')
Promisified 默认被引入了,等同于以下代码:
import {promises as fs} from 'fs'
os 包,导入就可以直接用:
await $`cd ${os.homedir()} && mkdir example`
zx 还可以从其他脚本导入:
#!/usr/bin/env node
import {$} from 'zx'
await $`date`
传递环境变量:
process.env.FOO = 'bar'
await $`echo $FOO`
执行远程脚本:
zx https://your-remote-server.com/example-script.mjs
# 部分资料参考
- How to Write Shell Scripts in Node with Google’s zx Library (opens new window)
- shelljs前端自动化 (opens new window)
- 使用javascript写shell脚本 (opens new window)
- nodejs写bash脚本终极方案! (opens new window)
- ZX 用JavaScript写bash脚本 (opens new window)
- nodejs写bash脚本终极方案! (opens new window)
- zx, 如何用Javascript优雅的书写脚本命令 (opens new window)
- Google zx 源码浅析 (opens new window)
- Google 脚本工具 zx 使用教程 (opens new window)
- How to Write Shell Scripts in Node with Google’s zx Library (opens new window)
- Zx - a Tool for Writing Better Scripts (opens new window)
- Write better bash scripts with Zx (opens new window)
- Create scripts in JavaScript with zx (opens new window)
- Google ZX source code analysis (opens new window)